Sometimes our summers are just as busy as our school year – but it’s a different kind of busy – as in, watering flowers, taking walks, riding bikes, grilling out, swimming, and staying up late. I like this kind of busy because it means we are outdoors most of the time. And, I love being outside – no matter how hot it gets!
Everyone knows the best way to cool down when it heats up outside is with ice cream treats. And, this family loves to do just that and chill on warm summer evenings. So, I thought it would be fun to create an outdoor sign to celebrate our favorite treats. Keep reading to find out how I created this DIY ice pop sign project with DecoArt Americana Premium. And, my new favorite sign paint!
I am part of the DecoArt core blogger team for 2017-2018. This post and paint is sponsored by DecoArt, but all opinions, ideas and creative inspo are from me.

Supplies
- Wood (canvas, metal, or whatever surface you love to paint on)
- DecoArt Americana Premium paints (I used Raw Umber, Pyrrole Red, Cobalt Teal Hue, Quinacridone Magenta, and Titanium White)
- Your favorite cutter or some stencils (optional – a pencil works well too!)
- Your favorite ice pops (to reward yourself with a delicious treat when you are finished – duh!)
Let’s begin.
Start by picking your sign canvas. Anything will do. Repurposed wood is one of our favorite sign materials. I purchased some old fence boards from a coworker who was replacing his fence and knew that I love to repurpose old materials.
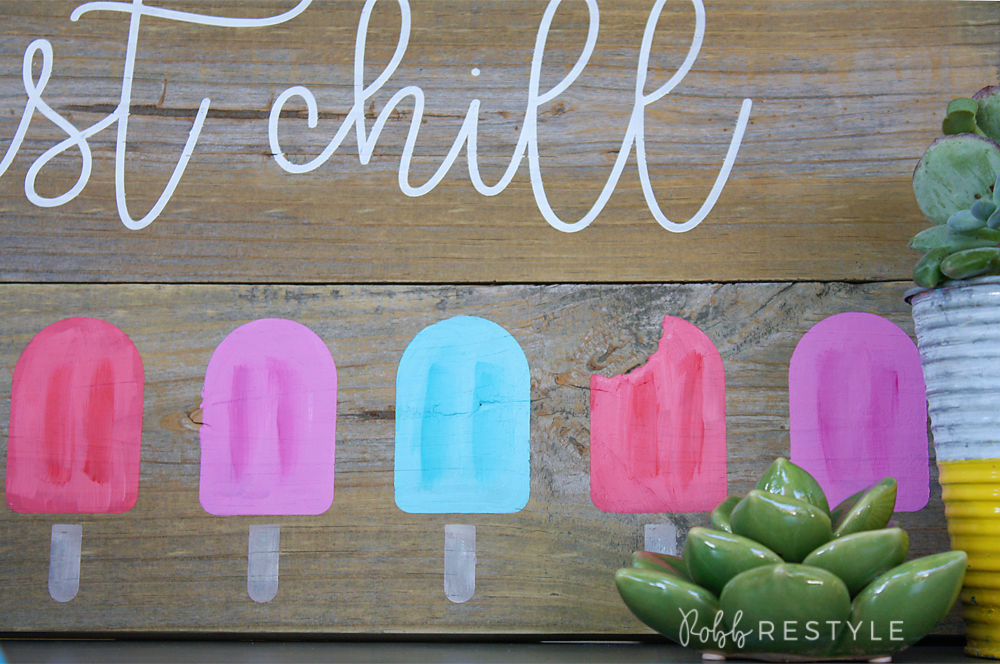
These old fence boards are great for signs. The boards are authentically aged with a slight gray hue and also fairly smooth for sign painting with a brush. We trimmed up one of the boards and attached two pieces with our staple gun and some scrap pieces of wood so the sign would be taller. The two boards gave me a nice border to work with and I decided to put words on top and pictures on bottom.

Next, paint the words. You could pencil them on your board/canvas and then trace with white/black paint. I love creating hand-lettered signs on my chalkboards. But, sometimes I want crisp lines (and I don’t want to fret about it being perfectly aligned), so I use my Silhouette Cameo to create a vinyl stencil. This way, I can paint the lettering quickly and then remove the vinyl for a near hand-lettered look.
BTW, I am obsessed with this hand-scripted font right now called Better Together. Download it here for free.

Mix it up.
I wanted my ice pops to be the same size and shape. So I created another simple stencil to paint the shape of the ice pop and the stick. I copied/pasted an ice pop shape in row and then included one ice pop with a bite out of it. Feel free to come up with your own ice pop shape, rocket pop, or even an ice cream cone instead!
I mixed a few Americana Premium colors for the sign text and ice pops. Raw Umber and Titanium White made a nice color for the sticks, and Pyrrole Red, Cobalt Teal Hue, and Quinacridone Magenta mixed with Titanium White created the flavor colors for the ice pops.
I love the bold hues of the Americana Premium paint. But, ice pops tend to be more pastel so I mixed white with my bold colors. Isn’t this coral shade perfect?! It’s a mix of Pyrrole Red and Titanium White.

You know what? Paper plates have always been my go-to paint palette. Nothing fancy, but we’ve always got some around the house and clean up is so much easier. I wanted to show you how I mixed each of the colors with white to create my pastels. You don’t have to mix the paint until it’s entirely blended. In other words, I left a little streaking for a subtle but more realistic effect.
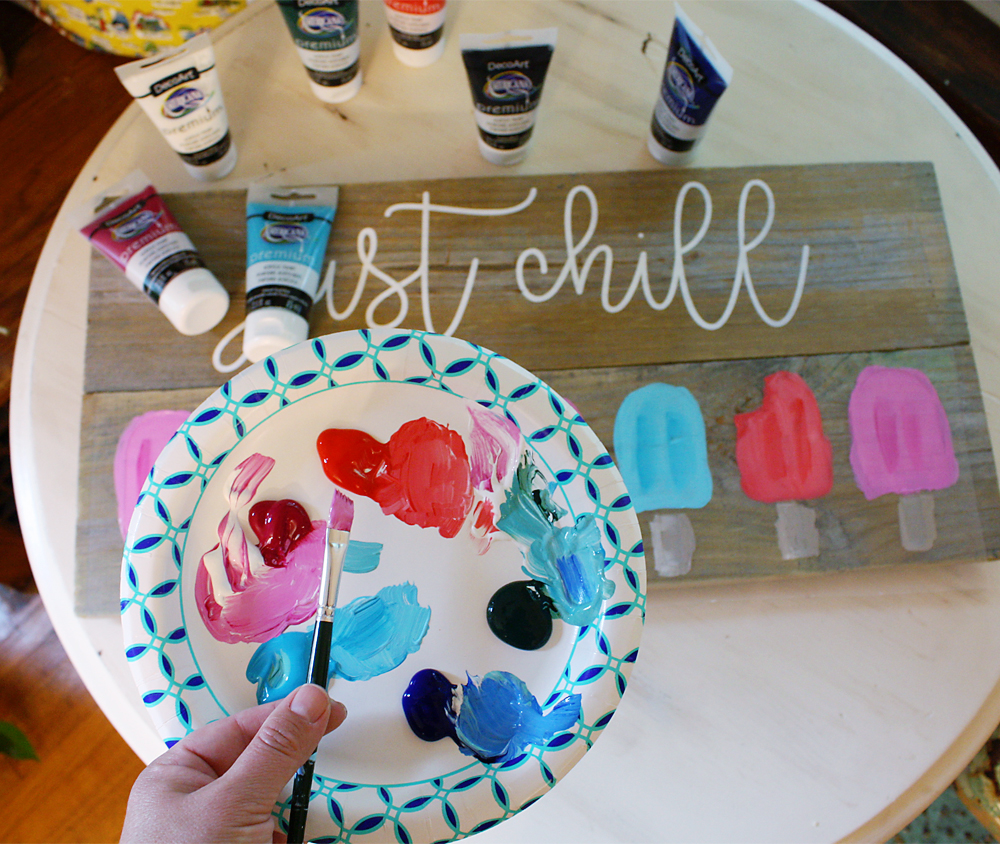
Then, to add the little indentations that most ice pops have, I dipped one edge of my brush in the solid (dark) paint color and lightly streaked it over the ice pop. Don’t worry, if you mess up, just paint over it with the mixed color and try it again. This paint is very forgiving. Keep working with it until you are happy with the effect on all of the ice pops. Believe me, I’m not an experienced freestyle painter, and this paint was so much fun to use. You really can’t mess it up.

This is a DIY project that’s easy to create and personalize with your favorite shades. I love making signs and have used all kinds of paint. Mostly, I dig in my old funiture paint because it’s what I have on hand. However, that is going to change. These acrylics are affordable and so much easier to mix and apply – especially when working with stencils and lettering. DecoArt Americana Premium paint has a next medium texture that didn’t creep under the seams of my stencil either. Game. Changer.

Seriously, how adorable is that ice cream towel? My little guy picked that out all on his own for my birthday… and it couldn’t be more perfect! He totally gets me.
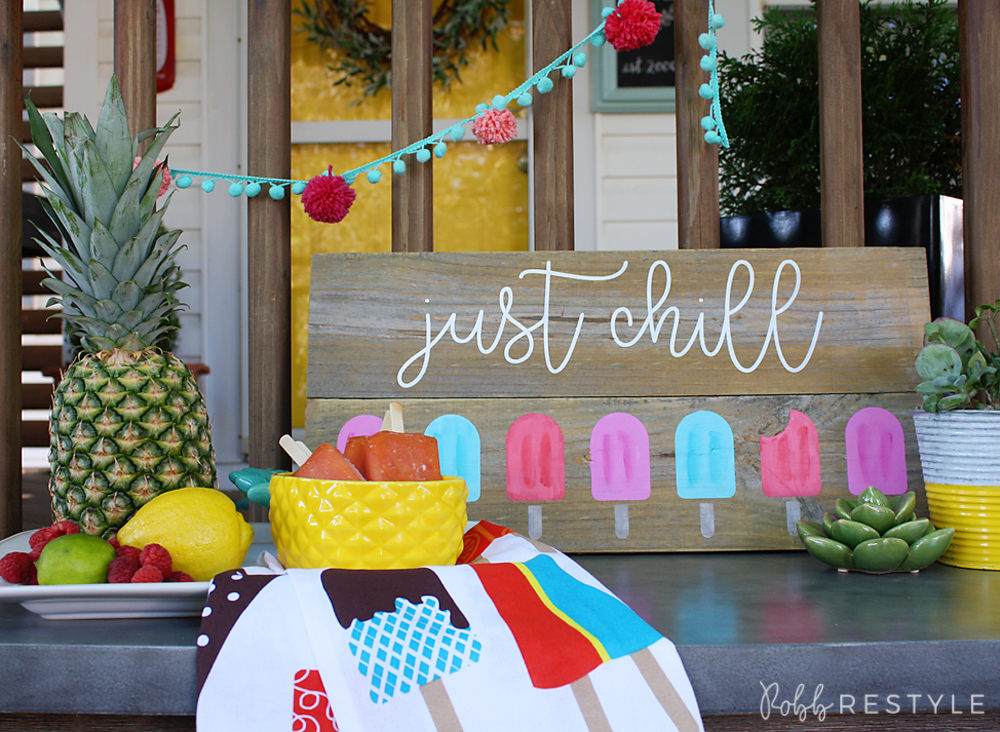
Around here, June was kinda packed with trips and summer sports… but this month, we are going take a little more time to do what the sign says. Just chill.
I hope you have more time to chill this summer too – mixed in with a little creative DIY, of course. 😉
Well isn’t this adorable! Too cute. Definitely going to steal your idea 😉