Paint your beadboard wall paneling like a pro with an easy-to-use paint sprayer made especially for those who love to DIY and upcycle projects.
Thinking of painting your wall paneling (or really anything)? I have a new tool that’s going to rock your world. Stay with me for all the details because after this, you’re going to want to paint all the things.
*This is a sponsored post. Wagner invited us to try their new Studio Pro Sprayer. I was compensated for this post, but all opinions and creative inspo are all mine! This post may also contain some affiliate links for your convenience. Robb Restyle may receive a commission, but you won’t pay a penny more. Thanks for supporting our flea market addiction. Click here to view our disclosure policy.*
Let me introduce you to the new Studio Pro Sprayer from Wagner. It was made for peeps like you and me – you know – the upcyclers, DIYers and creative spirits rescuing tables and thrifty finds from their ugly pasts.
Remember when we updated this bathroom last fall? Well, my upstairs bathroom was long overdue for a spiffy makeover – not the kind where you redo plumbing and tear down walls (although that’s what it needs, it just isn’t in the budget yet) … but the fresh-coat-of-paint-and-updated-decor kind of makeover. It’s the kind of makeover you squeeze into a weekend. And a Studio Pro Sprayer from Wagner helps make it a realistic weekend project.
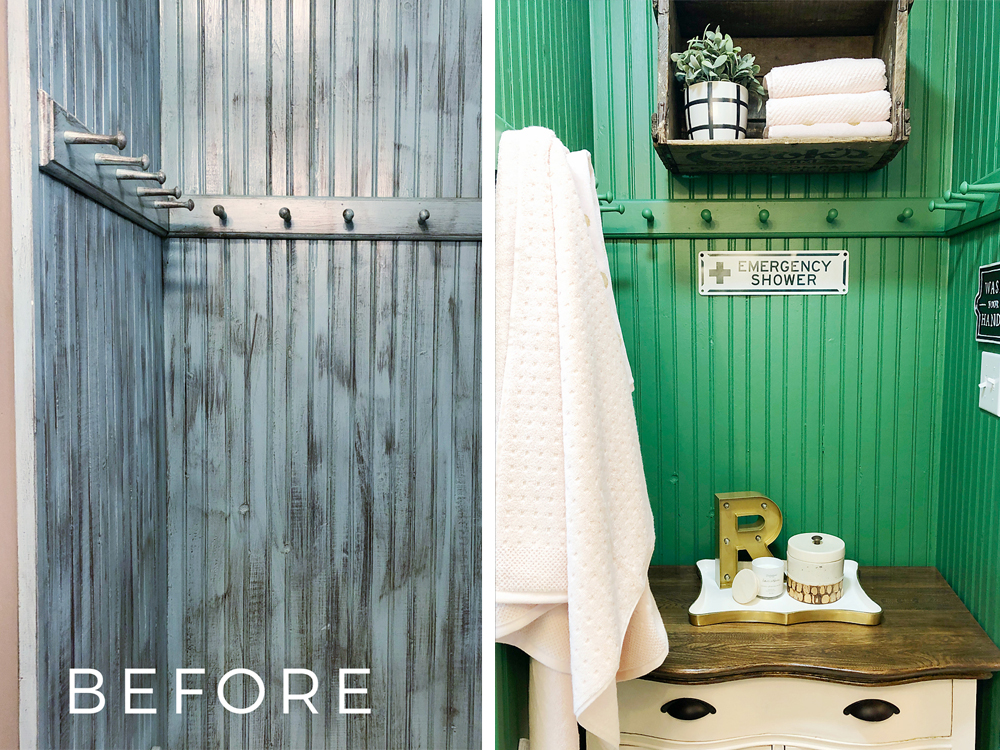
Here’s where my bathroom started… This picture is clearly taken before I knew how to use a camera without a flash. LOL. This is actually from a really old post where I shared how to make a DIY Fabric Window Shade.

What you can’t see in this terrible photo is a little nook that we paneled with beadboard and painted a rustic teal color. And instead of leaving it alone, I actually used a leather brush to add brown paint to make it look distressed… this was a time when everyone was distressing all the things.
The thought of painting over that dark color was a little intimidating and sounded like a lot of work. That is, until I was introduced to the Studio Pro Sprayer. I have used a paint sprayer before (remember this outdoor bench?) but I’ve never used one inside to paint a wall in my house.
I mean I’ve seen them do it lots of times on HGTV. They always made it look easy, but I was afraid it would be too much of a hassle or too messy for indoors. I couldn’t be more wrong.
What I love most about this paint sprayer is the even and smooth coverage. I painted this entire area with a single pass of the sprayer. And therefore painted this entire nook (floor to ceiling) in about 10 minutes. If I used a brush, I would have had to paint two coats and cut into all the crevices between the wood in a most time-consuming way.
I loved it so much on the beadboard paneling, that I painted the other half of my room with the sprayer as well. We painted our ceiling and walls the same color since it was going to be very neutral. Again, the coverage was ample on the walls! Only one pass needed there too. You guys… I can’t emphasize this enough – ONE PASS = TWO COATS OF PAINT!
And changing paint colors? Piece of cake.

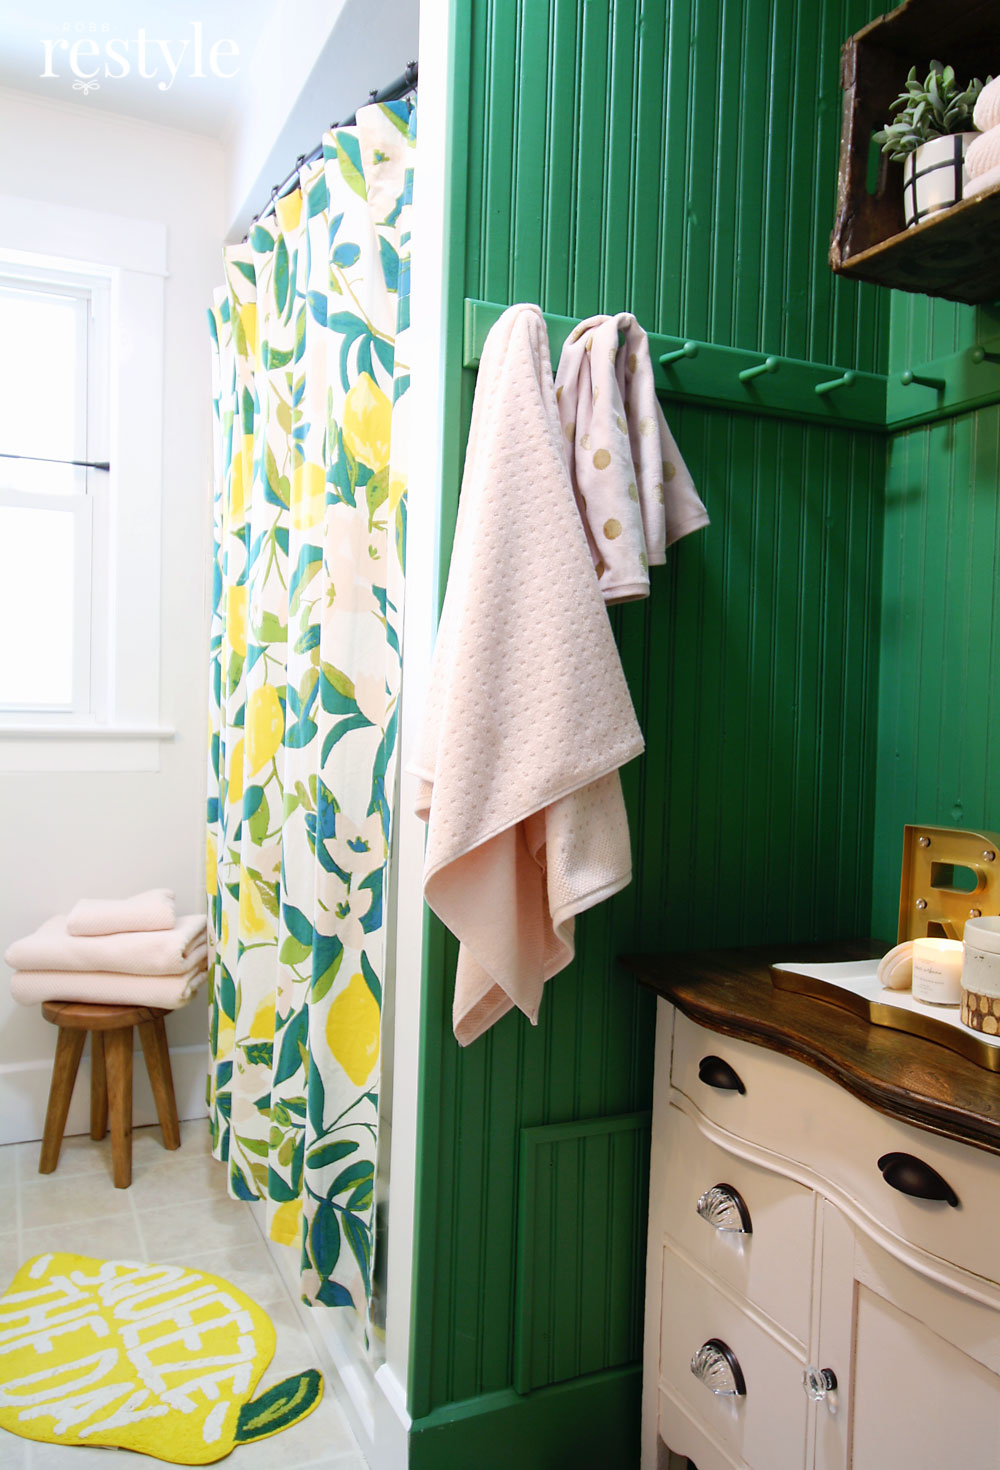
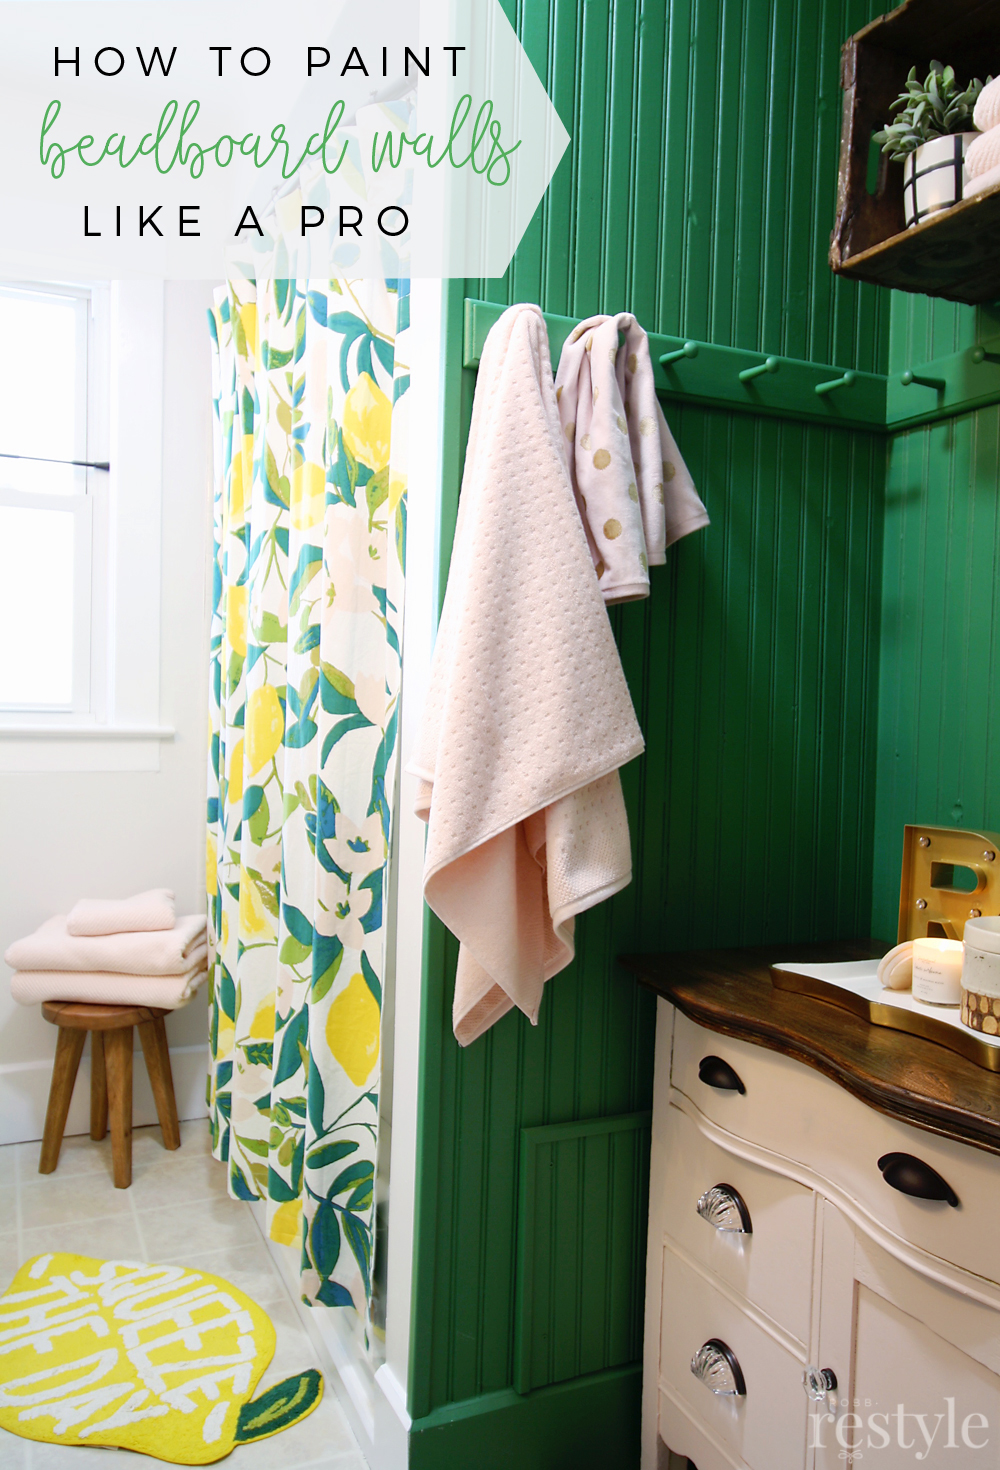
Here’s another look at the finished bathroom nook and my newly “green” beadboard. Find me on Instagram to see behind the scenes video of this project in my highlights.
Bathroom Makeover with a Studio Pro Sprayer

My paint colors were inspired by this adorable lemon shower curtain from Urban Outfitters. Paint colors are from Valspar: Green Mantle (green), Bare Necessity (pink), and Navy Bean (walls).
SHOP THIS ROOM

I’m not sure why I ever painted this room brown before, but this new wall color helped breathe some life and light into this small room.

We ended up adding a new vanity light. I would have loved to paint my vanity with the Studio Pro Sprayer too, but my new cabinet and drawer fronts didn’t arrive in time… We are just refacing the existing bathroom vanity until we tackle the plumbing issues.
So, stay tuned for a future update! The Studio Pro Sprayer is going to make that task a lot easier and faster as well.
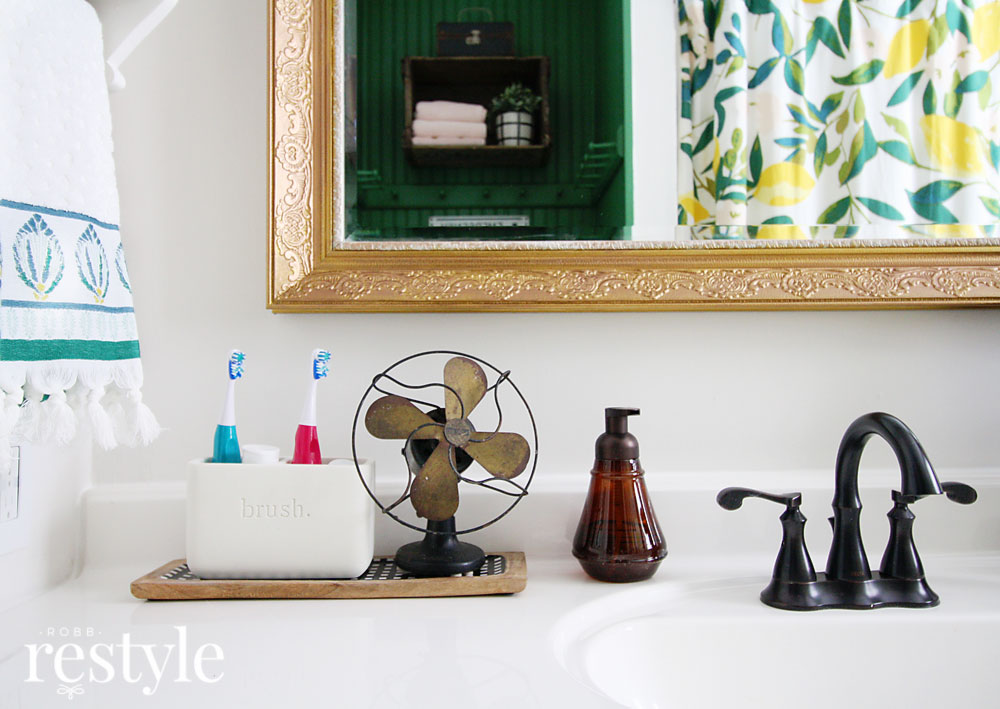
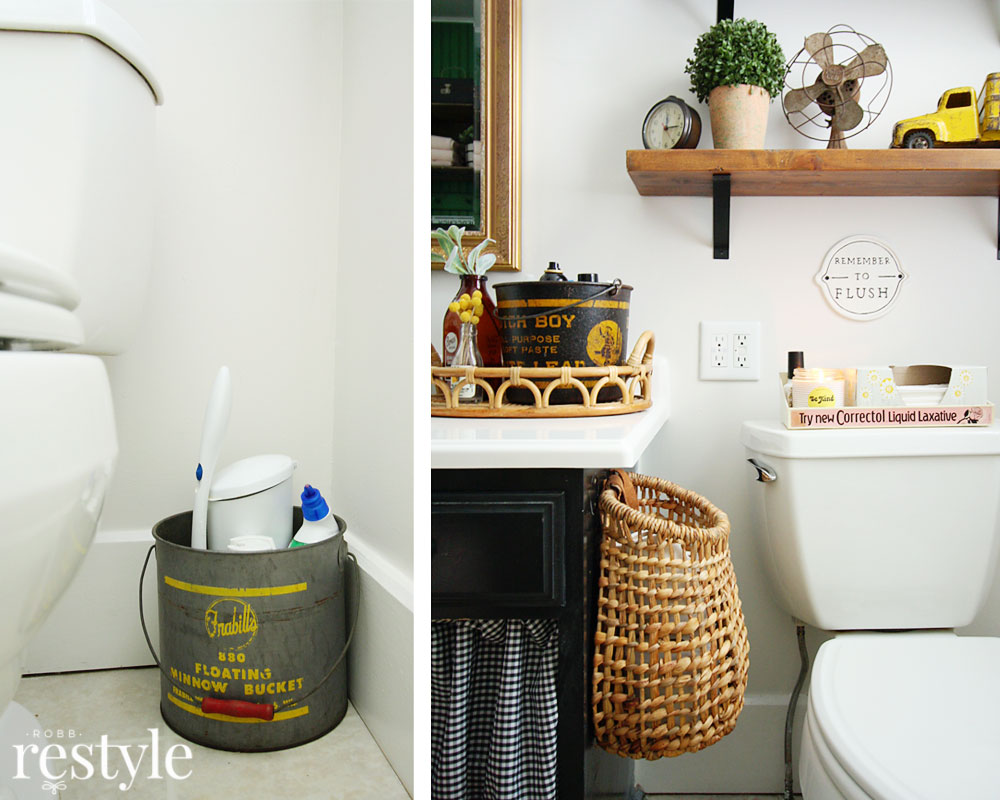
We did finally get rid of the old sink top and replaced it with a solid white version temporarily. I’ve been inspired by all the amber glass decor I saw last fall and decided to incorporate it in my bathroom makeover.

I didn’t want all my bathroom accessories to be yellow, so I decided to accent with blush pinks in the towels and this little sideboard I painted for extra bathroom storage.
Plus, how adorable is this vintage bathroom scale??? It still works!

I kept the wall shelves we already had but updated the shelf decor and created a little more distance between them for more wall height.
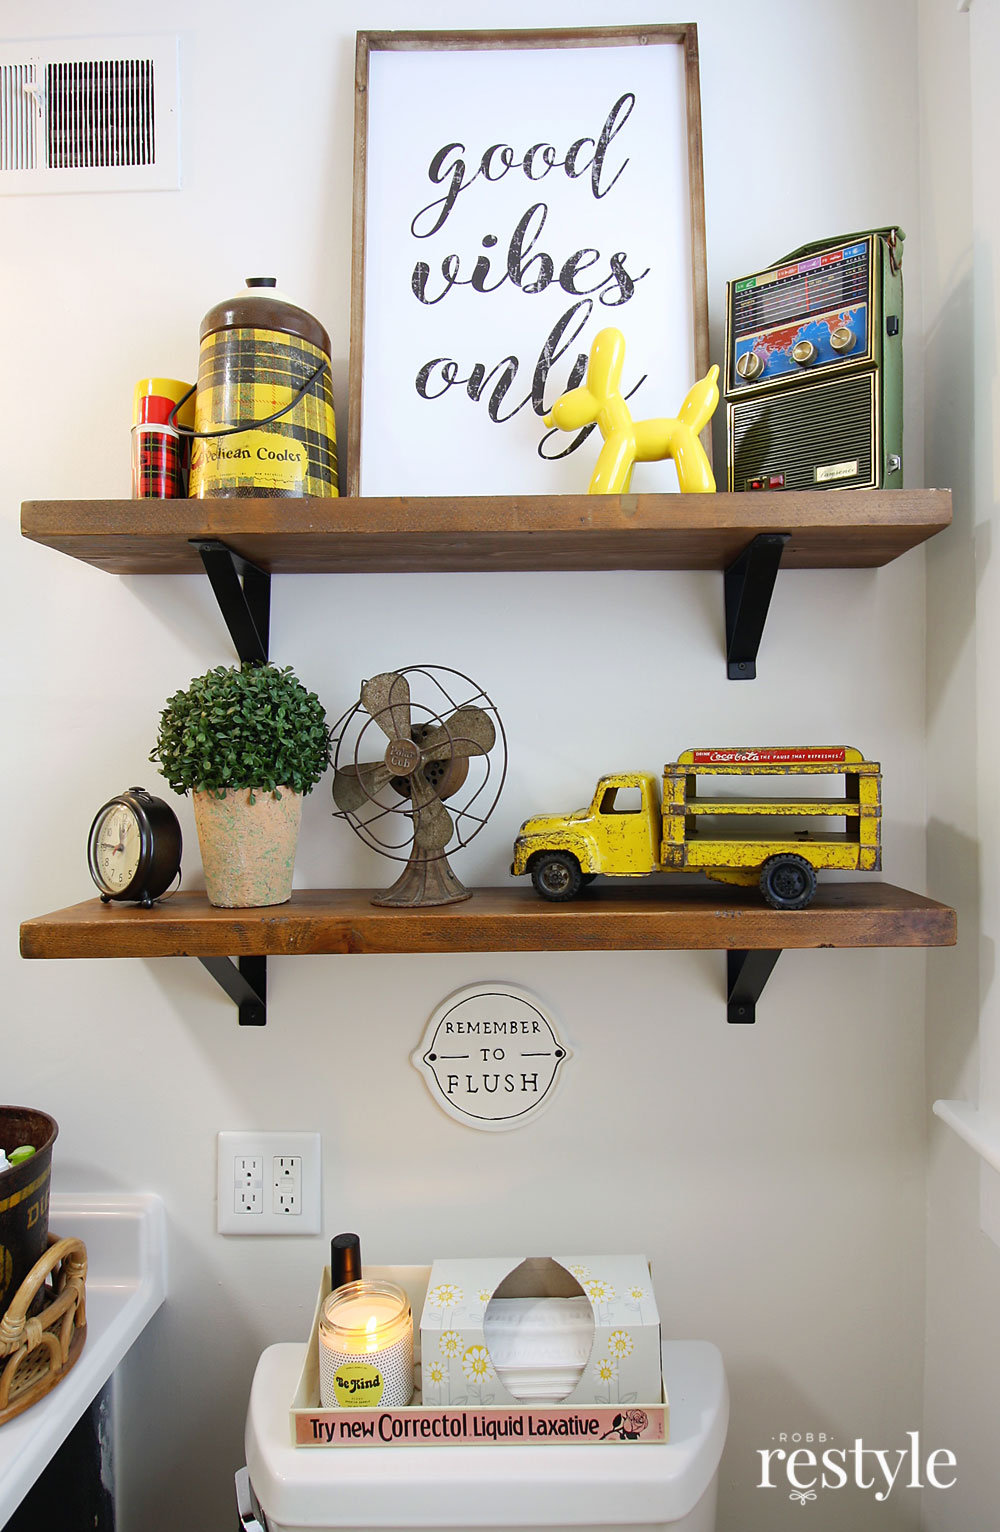
And you know how I love to repurpose my favorite vintage finds into practical storage, right? Well, I couldn’t pass up this old laxative advertising I found at a flea market this summer! I also used an old minnow bucket for bathroom cleaner and hung a basket for toilet paper storage. Who says you have to use traditional toilet paper holders in your home?
Ok, I hope you are convinced to give the Studio Pro Sprayer a try and take advantage of the $100 SAVINGS happening right now!
But just in case you need a little nudge, check out these other projects using the Studio Pro Sprayer:
How to paint walls fast by Hunt & Host
Windsor chairs makeover with Atta Girl Says

PIN THIS FOR LATER
This green is so fabulous I can hardly stand it! What a great refresh on this bathroom and I am sure the sprayer made it sooo much easier! Love love love it!
Thank you so much… and the sprayer was an amazing help!