This year we turned our spring break vacation into a DIY staycation!
We love to DIY our home projects but all this work in such a short period of time also reminded us that we aren’t in our 20s anymore. LOL. A lot of beer was consumed. But we had a deadline and we managed to make it happen.
You can check out our room inspiration here. Before the full room reveal, we are sharing our DIY shiplap ceiling project.
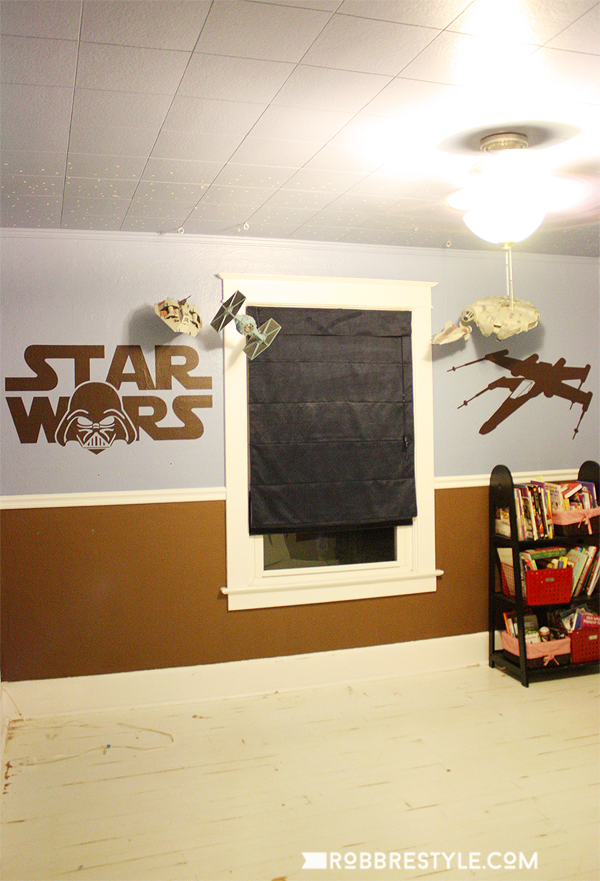
This little guy’s bedroom had a most unfortunate looking drop ceiling that was likely installed sometime in the 70s. It’s the only bedroom in the house with faux ceiling tiles so we wanted to finally fix it during this round of room renovations.
I’ve been eager to try shiplap somewhere in our house. We already love using beadboard (or wainscoting). It’s been our go-to fix for bad plaster walls and ceilings. It’s easy to install (you can put it right over the damaged plaster wall), relatively inexpensive and we love the cottage/farmhouse look it provides. See this post for more details on how we used bead board in our kitchen nook.
However there’s just something about shiplap that seems slightly less formal and feels way more rustic – making it a perfect fit for our vintage camping bedroom design.

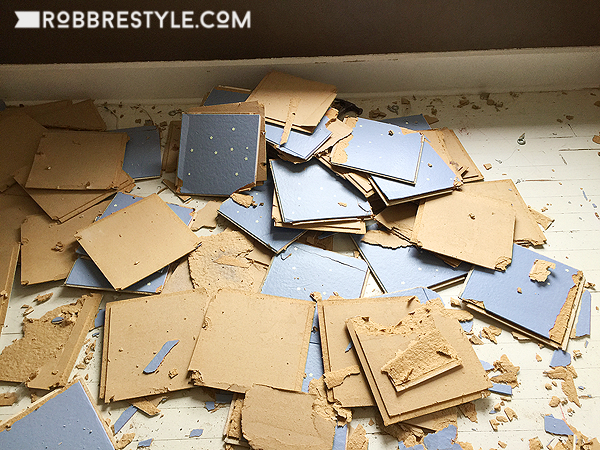
Removing the existing faux ceiling.
Corey used a flat tool called a sidewalk scraper to remove the compressed cardboard tiles. It was messy but rather easy (says the person who was out of town all day during this part). Ha, ha!
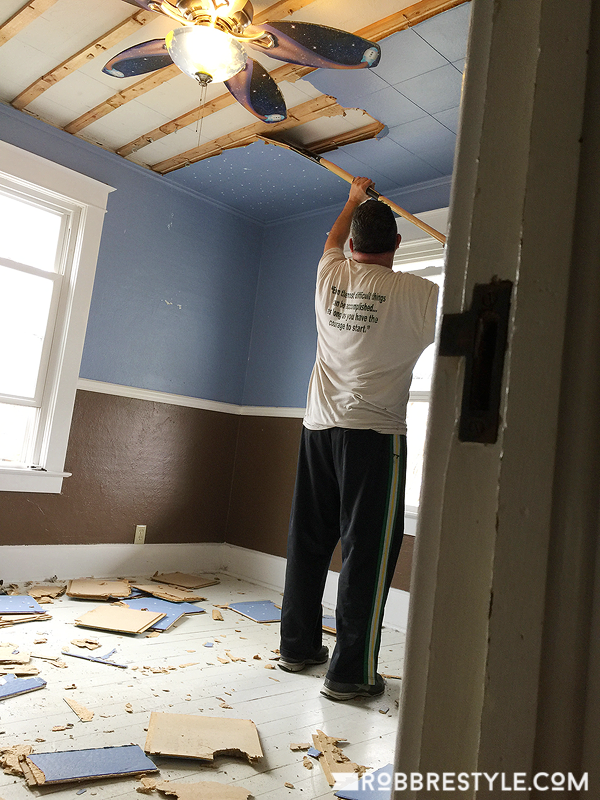
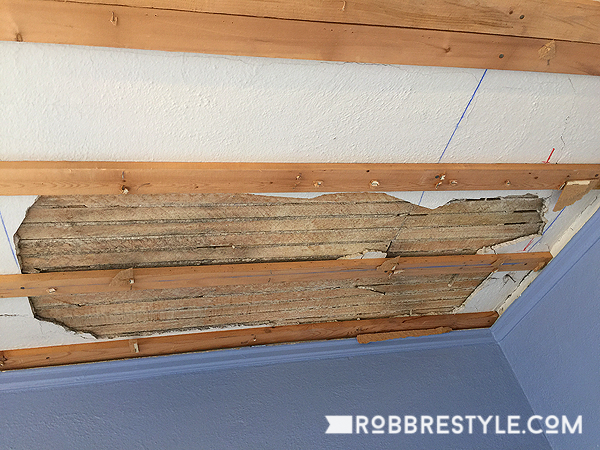
We were eager to tear those ugly tiles down and suspected there was a very good reason why they were added.
Indeed, there was.
Attach the shiplap boards to the furring strips.
Probably the only advantage to having this drop ceiling already in place was that we were able to reuse the furring strips – saving an installation step for the shiplap boards.
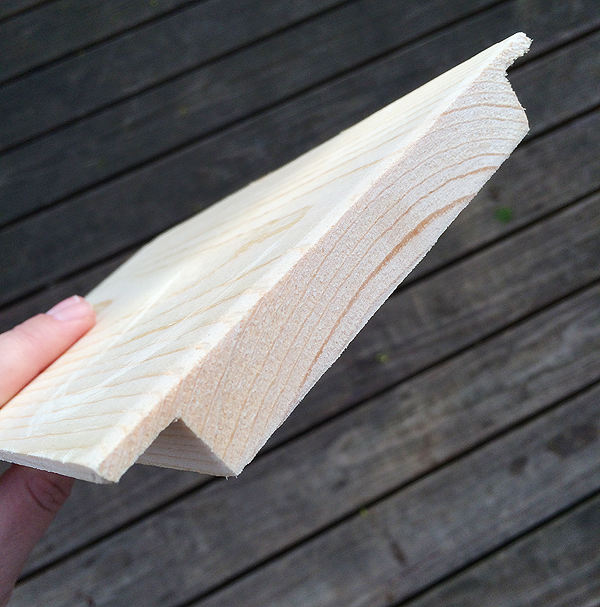
By virtue, shiplap consists of horizontal panels that overlap with grooved boards. We decided to make our own shiplap. Living in rural community, sometimes it makes sense for us to work with our local lumberyard instead of a big box store about 45 minutes away. We had our lumberyard route grooves in our 1×6 boards. It was about a $1 per board – not bad for the convenience.
Except we encountered a small snafu. There was some miscommunication about routing opposite sides. Instead of alternating edges, they routed both edges on the same side of the board. Whoops.
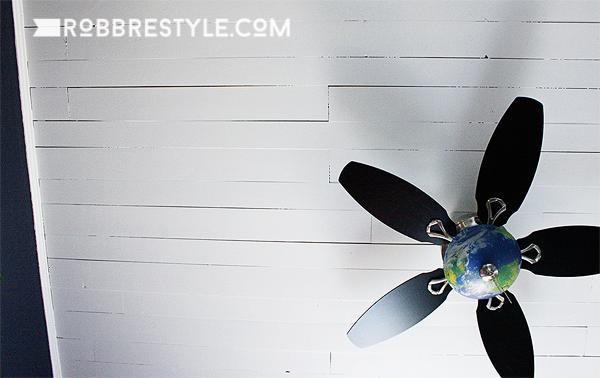
We had to stay on task. Our deadline was tight. We had to make these boards work. So we installed the boards and simply flipped every other board over to alternate the routed edge. Corey trimmed the length of some of the boards to give it a more staggered effect. The arrows point to varying seams.

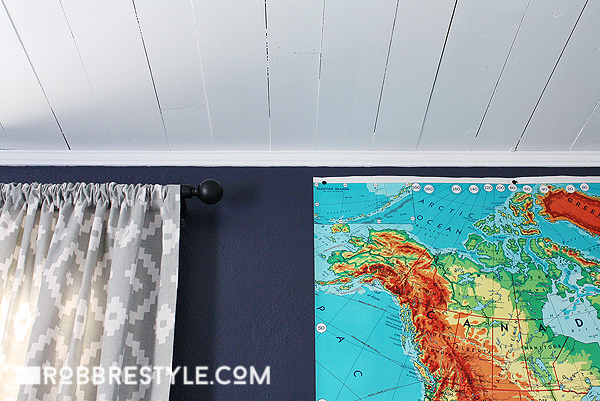
The result? The boards alternated in widths horizontally… and guess what? I loved how it looked. We painted it with our Purdy Power Lock Extension Pole. More on that tool later, but I can tell you we’ve never used a better extension pole. This one is both lightweight and sturdy – perfect for painting ceilings.
Ryobi Power Tools are right for the job.
We knew we would be making lots of cuts to stagger the boards on the ceiling so we connected with our friends at Ryobi and they generously gave us a Ryobi compound miter saw to review for this project. Corey had already experimented with this tool at the Haven conference last summer. He was impressed and knew it was exactly what we needed for our DIY shiplap ceiling project.
Our thoughts: This is an excellent miter saw. The laser guide helped make sure we made accurate and smooth cuts. This tool was critical in making sure our shiplap was on-point and we had minimal waste as a result. See it in action here. We already have a few more projects lined up for this power tool.
Once the boards were cut, we used our Ryobi Airstrike Cordless Brad Nailer to install the boards to the furring strips. We love all our Ryobi power tools. They bring full power to the job without the need to drag a heavy and loud air compressor up two flights of stairs. The 18v batteries hold their charge a long time. This tool has been a game changer for us – especially when installing boards on a wall or ceiling.

Another beautiful bonus? The nail holes are barely visible, which is perfect for shiplap. You want all that beautiful wood surface to be rustic, yet not full of visible holes. The Ryobi brad nailer is a favorite tool for projects all over the house.
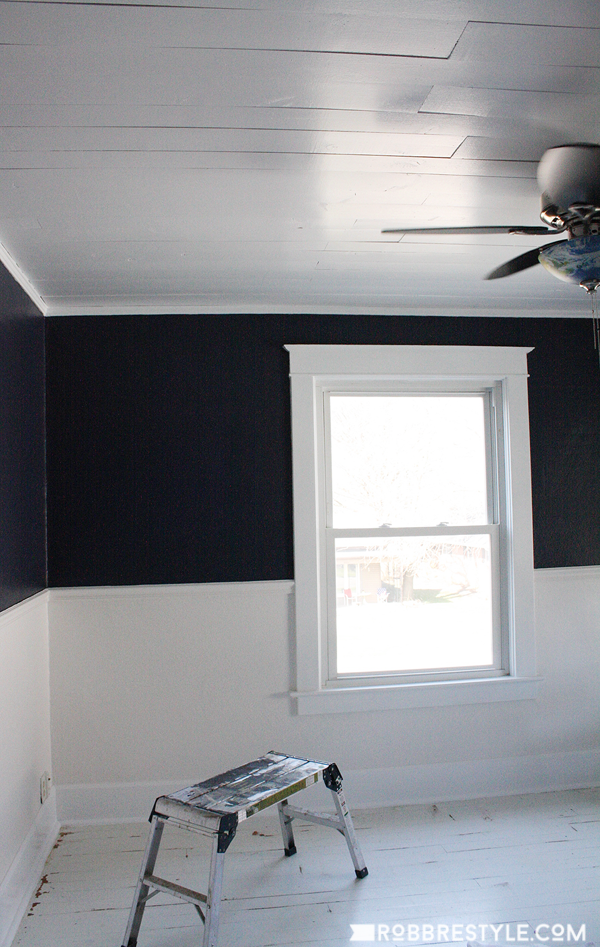
We love this new ceiling and I finally have SHIPLAP in my house! I think Chip and Joanna would be proud of our work here.
Be sure to come back for the final room review very soon. Tell me, have you tried shiplap in your own home yet? Or, do you prefer bead board and wainscoting?

*This post may contain some affiliate links for your convenience. Robb Restyle may receive a commission, but you won’t pay a penny more. Thanks for supporting our flea market addiction. Click here to view our disclosure policy.*

I am exhausted just reading this post. All this done in a week. You two never cease to amaze me. It looks really perfect for this bedroom. I can’t wait to see in person this summer. Love, Aunt Pat
Thanks, we can’t wait to show you too!!! And have a cocktail or two. Love you!