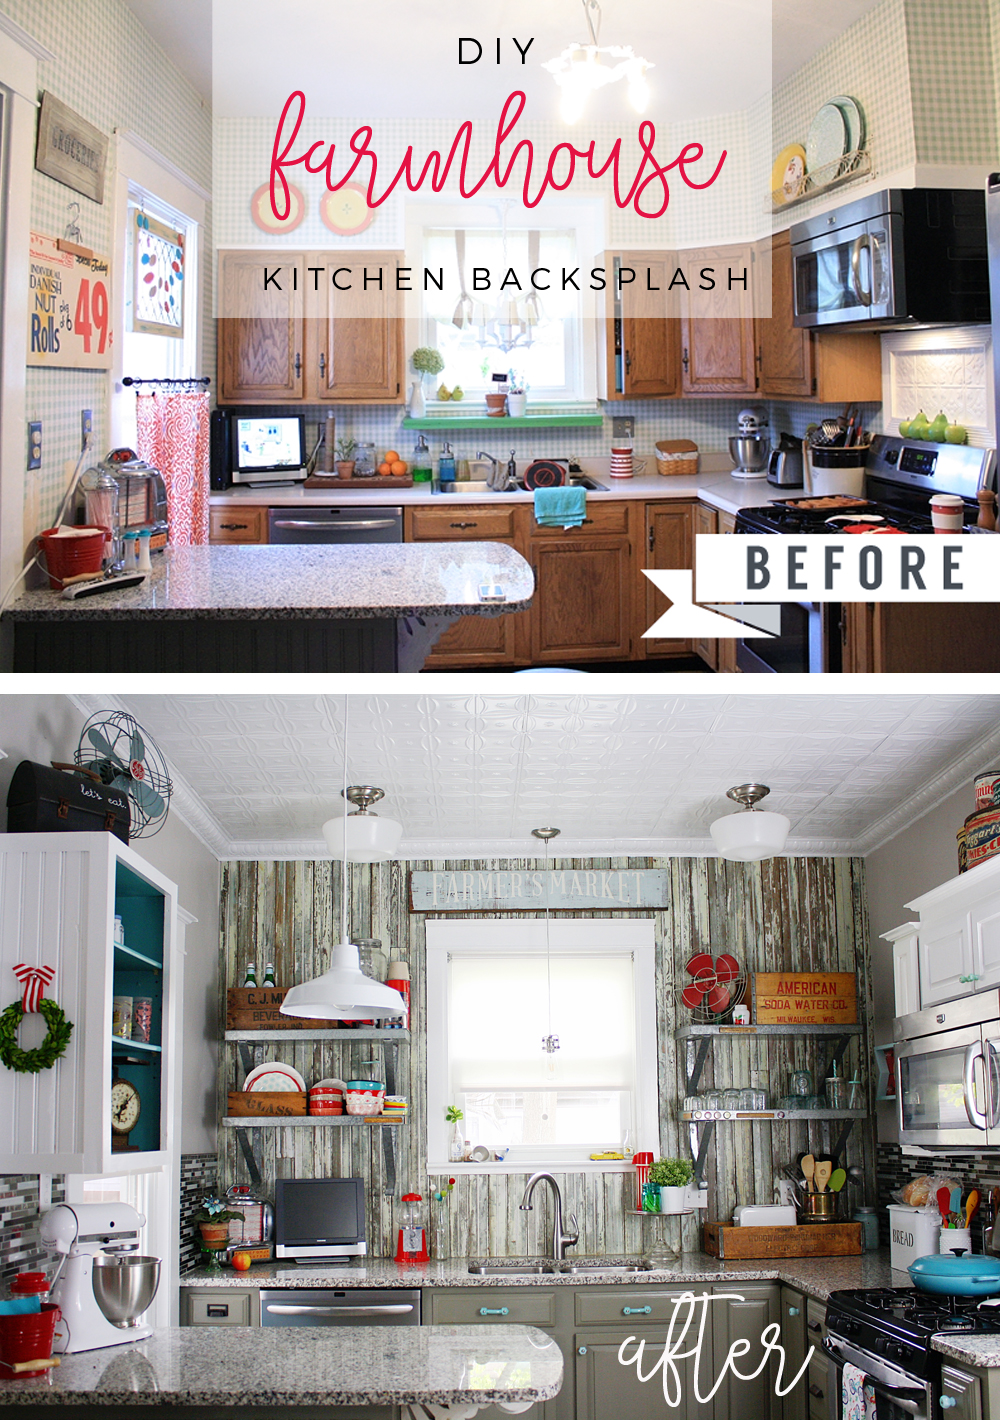
This project is by far my most favorite thing we did to our kitchen. We love using bead board (or wainscoting – whatever you like to call it) around the house. We have old plaster walls that aren’t in the best condition. Bead board is an easy and affordable update for our walls without the mess and cost of fixing the plaster.
UPDATE: And, it even landed us in our first magazine! See the details here.
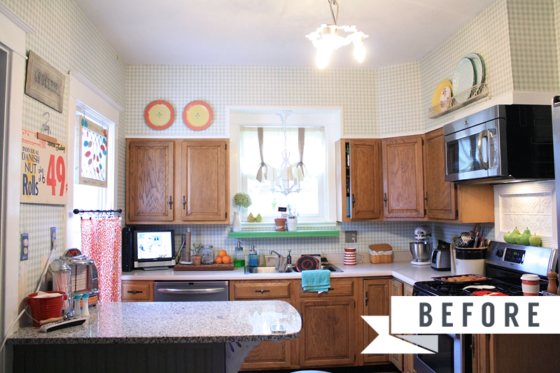
Catch up on Part 1 and Part 2 to see how we updated the corner (not shown in this before picture) and the kitchen island.
We figured the wall behind these upper cabinets would be in rough shape as well. Once we knew there was nothing behind the soffit, we decided to remove the upper cabinets and use open shelves for our kitchen storage. We tossed around different ideas for the walls like tile, white bead board, etc.
And then we discovered something fantastic on Craig’s List.
Someone was tearing down an old farmhouse nearby and selling the salvage piece by piece. Corey stopped by one day to see the house and discovered this really cool porch ceiling that had perfectly distressed paint in shades of white and blue.
And that’s when we decided we would repurpose this old ceiling for our kitchen wall backsplash.
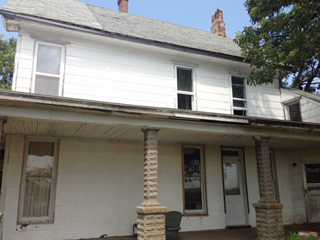
Old farmhouse being torn down.

Of course, we are always sad to see an old house razed to the ground. But, we were glad we could save a small piece of it in our repurposed backsplash.
The wood wasn’t free. And Corey had to take it down himself (along with years of raccoon and pigeon droppings). But it was a labor of love. And not a material we could find in a store.
Layers of paint weathered naturally over the years cannot be easily replicated.
We cleaned the boards and set them aside until our kitchen was ready. Here are a few pics of the cabinet demo.


Whenever I mentioned to someone that we were ready for the kitchen demo, they would always respond with how much fun demolition is and how much they LOVE that part of the project.
But let’s be real. This is your kitchen. It isn’t easy to cook without decent access to your sink, no microwave, dishes in boxes all over the house, and the huge mess that plaster walls make anytime you do any renovation near them.
I can’t even imagine if we would have gutted this entire space and started from scratch.
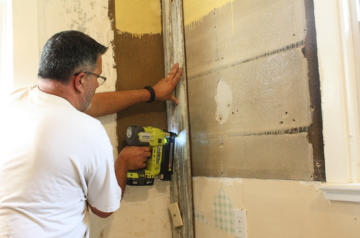
This project (and really any time you install bead board) requires a handy nail gun. We used our Ryobi Cordless Brad Nailer for the job. It’s a powerful tool that is easy to handle one-handed as he installed each board. Corey loves that the battery lasts a really long time and the power doesn’t weaken as you use it – when the battery eventually runs out of juice, it simply dies – but strong til the end. He purchased 2-inch nails for this project.

Once he got going, it went pretty fast. The biggest challenge was lining up to a wall and ceiling that weren’t square – and if you love old homes, you just work around it. By the time we got halfway through, we were in love with it!

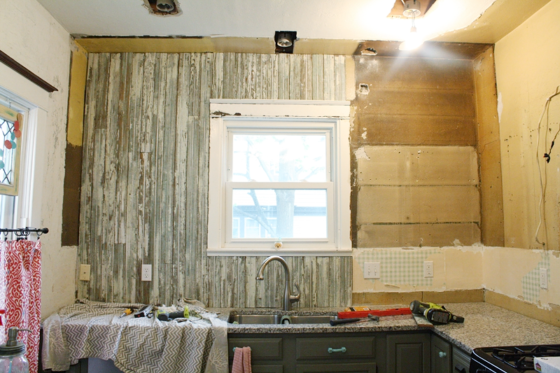
Unfortunately we had planned to go all the way around the corner on the right until the tile backsplash behind the stove, but we didn’t have enough. So we purchased the same tile we used in the kitchen corner and island to add along both walls.


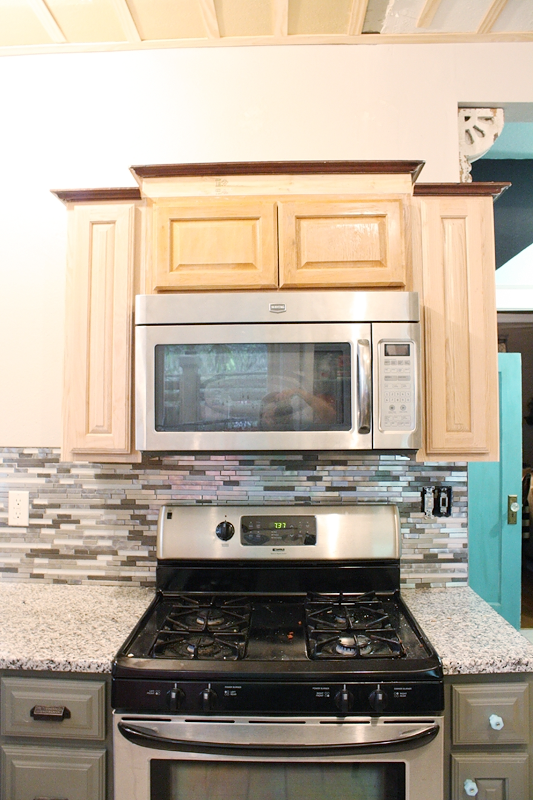
We also lowered our microwave and added a few upper cabinets to store spices, oils and such. We customized our stock cabinets by adding some repurposed trim Corey had found at an auction and adding a little height to the middle cabinet. Then he added some bead board to the sides before we painted them white.

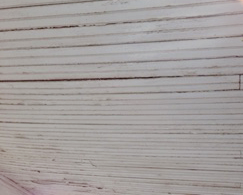
Here’s a close up so you can really see the texture and color of the bead board. It really is beautiful.

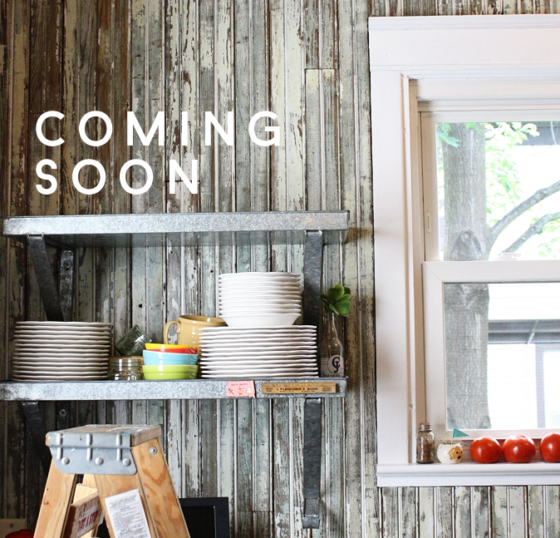
My shelves are installed but I’m saving that for my next post… when my window treatments finally arrive! You can see the boards on the ceiling since these photos were before we added the decorative tin ceiling tiles. So much more to come!
Here’s a sneak peek!
UPDATE: See the final kitchen reveal here!
Thanks for being patient… until next time.

this is my dream kitchen, but alas i will never have it so glad you do xx
Oh, never stop dreaming Chris!
Love, love, love it!